The Ultimate Guide to Home Gym Setup in Australia
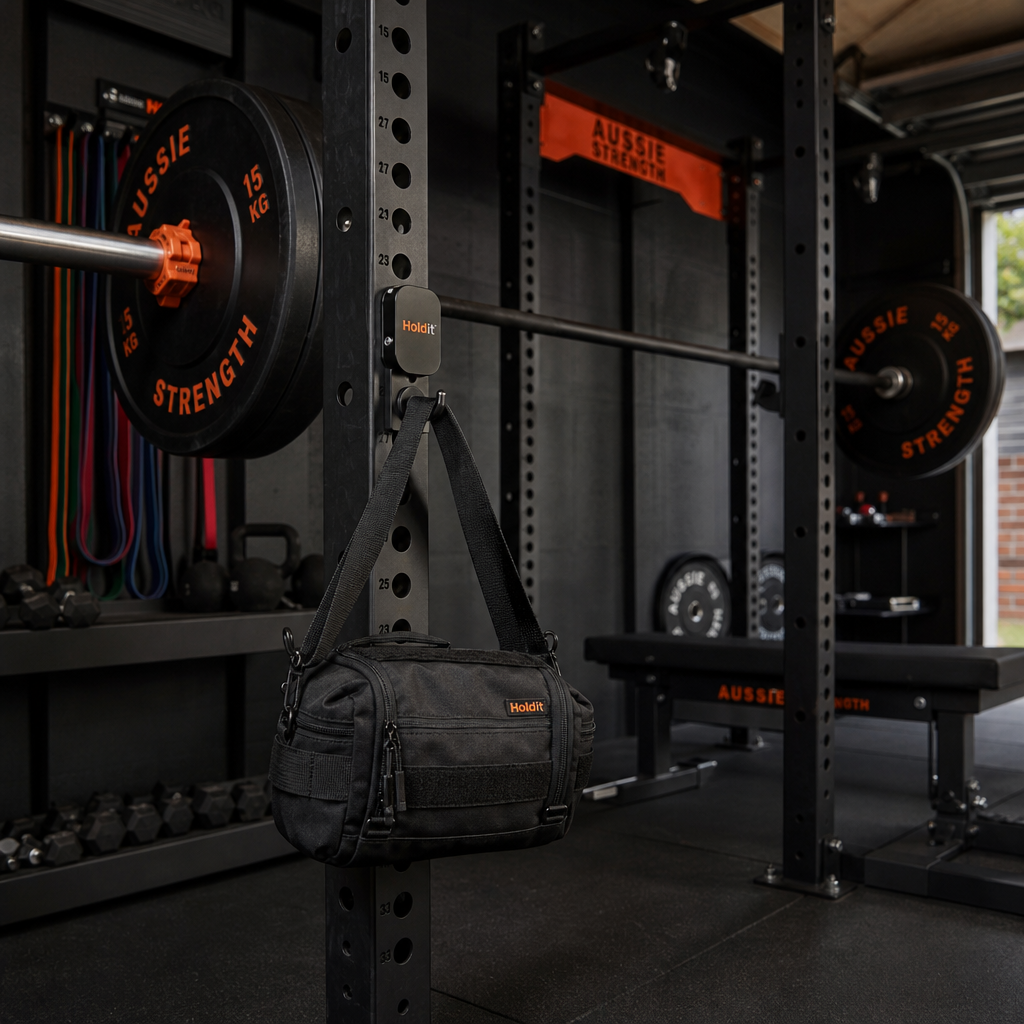
Building a home gym setup in Australia requires precise planning, strict budgeting, and a zero-tolerance policy for floor clutter. Most people get the equipment right but fail at organisation. They buy a rack, a barbell, and plates, then dump their training bag on the floor or balance it on a bench. This destroys your training flow. At HoldIT Bag, we know that the gym floor is not a storage solution. Every second spent hunting for your phone or worrying about where your keys ended up is energy taken away from your training.
A proper home gym setup works as hard as you do. It is a dedicated environment engineered to produce specific physiological adaptations, whether that is building strength, increasing work capacity, or improving cardiovascular health. In Australia, where local gym memberships average between $25 and $50 per week, a well-planned home gym pays for itself in two to three years. However, the physical equipment is only half the equation. If your gear creates friction between sets, your setup is broken.
This guide breaks down exactly how to build a home gym in Australia. We will cover space planning, home gym essentials, structural requirements, and home gym equipment cost. More importantly, we will detail how to solve the most ignored problem in home training: gear organisation. Purpose-built systems always beat adapted habits. Let us get your space sorted so you can focus on training.
Key Takeaways
- Prioritise structural integrity: Ensure your flooring can handle dropped weights and your ceiling height accommodates a power rack before buying any equipment.
- Core equipment over novelty: A power rack, barbell, plates, and an adjustable bench cover 90% of effective strength training needs.
- Manage home gym equipment cost: Expect to spend between $1,500 and $3,500 AUD for a quality, entry-level to mid-tier setup in 2026.
- Eliminate floor clutter: Floor bags pick up dirt and create bench clutter. Magnetic bag hooks keep gear elevated, secure, and within arm's reach.
- Organisation is a performance metric: Removing friction between sets directly improves training focus and session density.
Summary Table: Home Gym Setup Tiers
| Setup Tier | Target Audience | Estimated Cost (AUD) | Key Equipment | Space Required |
|---|---|---|---|---|
| Basic | Beginners, casual lifters | $500 - $1,500 | Adjustable dumbbells, flat bench, interlocking mats | 2m x 2m |
| Intermediate | Regular lifters, strength focus | $1,500 - $3,500 | Power rack, barbell, plates, adjustable bench | 3m x 3m |
| Commercial Grade | Advanced lifters, heavy use | $4,000+ | Multi-rack, calibrated plates, specialised machines | 4m x 4m+ |
Planning Your Home Gym Setup Australia
Planning is the most critical phase of building a training space. Enthusiasm often drives people to buy equipment first, only to realise it does not fit the room or that the floor cannot support the load. In Australia, homes typically feature either suspended timber floorboards or concrete slabs. Both require different preparation strategies. Concrete slabs on the ground floor or in a garage are ideal. They handle high point loads without modification. Suspended timber floors require thick rubber lifting platforms to distribute the force of dropped weights, preventing structural damage and minimising noise transmission.
Measure your space meticulously. You need a minimum of 2.4 metres of clearance above the floor for a standard power rack, plus extra room for overhead pressing movements if you plan to press inside the rack. If your ceiling is too low, you will quickly restrict your exercise selection. Consider access points. Ensure you can actually fit a 2.2 metre barbell or a large rig through your doors, hallways, or stairwells before finalising your equipment list. Furthermore, ventilation is non-negotiable. Australian summers get hot, and a closed garage without airflow will become a sauna. Install exhaust fans, a portable air conditioner, or at minimum, a heavy-duty pedestal fan to manage humidity and body temperature during intense sessions.
Choosing the Right Location
The best location for a home gym is usually a garage. Garages offer solid concrete flooring, high ceilings, and separation from the living areas, which contains noise and smell. A spare bedroom is an option for beginners focusing on bodyweight or light dumbbell training, but it rarely supports the heavy structural loads required for progressive overload. If you must use an upstairs room or a room with timber floors, you must invest in a heavy-duty lifting platform. Build the platform using multiple layers of plywood topped with thick horse stall mats. This creates a dense shock-absorbing surface that protects your floor joists.
When selecting your space, look for vertical metal surfaces. A standard power rack, dumbbell rack, or the upright of a cable machine offers the perfect anchor point for your gear. This is where the HoldIT Bag system excels. Instead of leaving your bag on the floor in a high-traffic zone, our magnetic bag hook snaps onto your station securely. This simple change keeps your gear off the floor and ensures your bench stays clear of clutter, eliminating trip hazards and keeping your focus exactly where it belongs.
Home Gym Essentials: Equipment Selection
Selecting the right equipment dictates your training outcomes. Avoid novelty items. Stick to heavy, structural compound movements that build real strength. The core of any effective home gym setup revolves around five primary pieces of equipment: a power rack, a barbell, weight plates, an adjustable bench, and a cardiovascular tool. This selection provides endless programming variations, from heavy squats and deadlifts to flat and incline pressing.
When considering home gym essentials, prioritise weight capacity and steel gauge. A power rack made from 75x75x3mm steel will last a lifetime. Do not compromise on the structural integrity of your rack, as it is the only thing standing between a heavy barbell and your neck. Buy a rack that allows you to bench press and squat safely inside the J-cups and safety spotter arms.
Barbells, Plates, and Racks
Invest in a quality 20kg men's Olympic barbell or a 15kg women's barbell with a tensile strength of at least 190,000 PSI. This ensures the bar will not permanently bend under heavy loads or if dropped. For plates, bare steel or cast iron plates are the most cost-effective. If you plan to deadlift heavily, bumper plates are a wise investment. Bumper plates are made from dense rubber and protect both your barbell and your floor when dropped from overhead.
As your equipment list grows, so does the need for organisation. A common mistake is accumulating lifting belts, chalk, resistance bands, and recovery tools, then leaving them scattered across the gym floor. This is where your gear management system becomes critical. You need a dedicated solution for your personal items. Your phone, keys, wallet, earphones, water bottle, and lifting accessories need an immediate, accessible home. We designed the HoldIT Bag precisely for this reason. It holds up to 4kg of gear and ensures everything you need is within arm's reach, keeping the floor clear of obstacles so you can focus on training without distractions.
Home Gym Equipment Cost in Australia
Understanding the home gym equipment cost is vital for setting a realistic budget. In 2026, the Australian market for fitness equipment has stabilised following the supply chain fluctuations of the early 2020s. Shipping container costs have normalised, meaning local stock is readily available, but the baseline price of raw steel and rubber has permanently shifted upward. Expect to pay a premium for locally warehoused stock compared to direct-from-manufacturer overseas imports.
For a reliable intermediate setup, budget between $1,500 and $3,500 AUD. This figure covers a solid power rack, a high-tensile barbell, approximately 150kg of weight plates, and a heavy-duty adjustable bench. If you purchase commercial-grade equipment, costs escalate quickly. Commercial rigs, calibrated plates, and specialised cable attachments can push your budget past $5,000 AUD. However, buying quality once is cheaper than replacing cheap equipment every two years. Factor in additional costs for flooring, which we will cover next.
Budgeting for Quality vs Cost
It is tempting to buy the cheapest 150kg barbell set available online, usually priced around $300 to $400 AUD. Avoid this. Cheap barbells often feature low tensile strength and poor knurling, leading to grip failure and potential injury. The rotating sleeves on cheap barbells frequently seize up after a few months of heavy use. Allocate the bulk of your budget to the barbell and the plates. Save money on the rack if necessary, provided it meets minimum safety standards for steel thickness.
Remember to budget for organisation. If you spend thousands on quality iron, do not leave your training bag on the floor where it gets kicked, stepped on, or covered in chalk dust. You can explore our range of purpose-built organisational solutions at the HoldIT Bag shop. We believe serious gym-goers deserve a setup that works as hard as they do. Purpose-built always beats adapted.
Flooring and Storage Solutions
Flooring is your first line of defence against structural damage. Dropping a 100kg loaded barbell onto a bare concrete slab will chip the concrete and bounce dangerously. You need high-density rubber flooring. The industry standard is 15mm to 20mm thick rubber gym mats, often sold in 1m x 1m interlocking squares or as large horse stall mats. These mats absorb impact, deaden sound, and provide excellent grip for foot placement during heavy lifts. Ensure you sweep and mop the mats regularly. A dirty floor ruins your gear.
Storage extends beyond mats. You need plate storage trees, dumbbell racks, and a system for your barbell accessories. Most importantly, you need a system for your personal bag. A standard duffle or tote bag is not sufficient. A floor bag, regardless of brand or quality, does not solve the core problems serious lifters face: floor hygiene, bench clutter, and phone safety between sets. Every conventional bag sits on the floor and picks up whatever is on the floor. It offers no solution to keeping gear within arm's reach during a session or keeping benches clear.
We strongly believe most gym-goers do not need a 40L duffle. They need their phone, keys, wallet, earphones, a water bottle, and maybe some lifting accessories. A bag that is right-sized for what you actually carry is more useful than one that fits a week's worth of clothes. Oversized bags encourage carrying gear that does not improve training and create more friction, not less.
Solving Gear Organisation with HoldIT Bag
Clutter is the enemy of focus. The biggest problem we see in home gym setups across Australia is gear ending up on dirty, high-traffic floors because there has never been a better option. People balance their bags on a bench, where they inevitably slide off. They leave their phones on plate storage racks. They drop their keys in the chalk bucket. This chaos costs you time and mental energy. At HoldIT Bag, our position is that a bag designed specifically for how serious lifters train will always outperform a general-purpose bag pressed into service at the rack.
The fix should be simple, immediate, and permanent. The HoldIT Bag is exactly that. It acts as your silent training partner, quietly holding your gear exactly where you need it. The core mechanism is our high-strength magnetic hook. It holds up to 4kg of load easily. You simply place it against the upright of your power rack, your cable machine, or your dumbbell rack, and it snaps onto your station instantly. No drilling, no screws, no permanent fixtures required.
Case Studies: Real Results in Gear Management
We track our data closely because numbers reveal the truth about performance. Over 10,000 community members in the HoldIt crew use our gear daily, and our average customer review rating sits at 4.8 out of 5 based on 895+ verified reviews. Here is how changing the gear management system directly improved training sessions for two specific users.
First, consider a regular gym-goer training 4 to 5 sessions per week. They were repeatedly losing track of their phone and keys between sets. They left their bag unattended on the floor or balanced on a bench, where it constantly slid off. This disorganisation caused genuine interruptions to their training flow and added unnecessary stress to each session. The intervention was simple. They attached the HoldIT magnetic bag hook to the upright of a cable machine and a squat rack, keeping their bag elevated, secure, and within arm's reach throughout every working set. The outcome was immediate. Distractions between sets dropped instantly. The user reported reclaiming focus within the first session and no longer spending time searching for misplaced items, estimating they saved 5 to 10 minutes of wasted movement per session across their weekly training schedule.
Second, a gym member at a commercial facility noticed there were no dedicated bag hooks near the free weight stations. This forced members to pile bags along walls or on benches, creating trip hazards and cluttered training floors. The member wanted a personal solution they could bring in without needing gym management approval. They clipped the HoldIT bag hook onto any available vertical metal surface throughout the gym. They used it on rack uprights, cable towers, and dumbbell rack frames. The 4kg magnetic load capacity held their gear securely across every zone of the gym without relying on fixed infrastructure. The portability meant one hook covered every station in their session, removing the need to compromise on where they trained based on bag storage availability.
These examples prove that solving a simple physical problem yields immediate psychological benefits. When you remove the friction of managing your loose items, you free up cognitive bandwidth for the lift. You stop worrying about your phone and start focusing on your brace.
Maximising Your Lifting Accessories
Beyond your main lifts, accessory work requires organisation. Resistance bands, lifting belts, wrist wraps, and chalk all need dedicated homes. Leaving them on the floor ensures they degrade quickly. Rubber degrades when left in direct sunlight or under heavy plates. By keeping your smaller accessories in a dedicated, elevated bag, you extend the lifespan of your gear. The HoldIT Bag ensures your bench stays clear. You no longer have to move a heavy gym bag off your flat bench before you start your dumbbell pressing.
Case Study: The Complete Home Gym Change
Let us look at a comprehensive garage gym setup in a suburban Australian home. The user, an intermediate lifter, allocated a two-car garage space. The foundation consisted of a 3m x 3m interlocking rubber matting area covering the concrete slab. This managed impact and noise. They installed a standard 75x75x3mm power rack bolted directly to the slab. The equipment cost breakdown was precise: $1,200 AUD for the rack and accessories, $800 AUD for a high-quality 20kg barbell and 150kg of plates, $400 AUD for a heavy-duty adjustable bench, and $250 AUD for flooring. The total physical equipment cost reached $2,650 AUD.
However, the lifter noticed that despite having world-class equipment, their sessions felt disjointed. They were walking back and forth to a corner table to grab their water bottle and towel. Their phone sat on the garage workbench, three metres away from the squat rack. They wasted energy checking notifications between sets and felt a constant low-level annoyance at the clutter in their training zone.
The final piece of the puzzle was implementing a dedicated gear management system. They purchased the HoldIT Bag. This instantly elevated their personal items off the garage floor. The bag snapped onto the front upright of their power rack. Within their first session using it, they noted a drastic change in their pacing. Their phone, keys, belt, and chalk were all contained in one place, right where they needed them. This completed the setup. They spent thousands on iron and steel, but a relatively tiny investment in gear organisation was what finally locked in their focus and eliminated session friction.
Why Standard Duffles Fail
The fitness industry pushes massive, 40-litre duffle bags on consumers. Marketers tell you that you need to carry three changes of clothes, a full toiletry bag, and a bulky pair of training shoes every single day. We completely disagree. If you are training in your home gym, or even at a commercial gym, the reality of what you need is much smaller. You need your phone, your keys, your earphones, and a few small lifting accessories. Maybe a water bottle.
Standard duffles fail because they are designed to sit on the floor. They have no built-in mechanism to attach to the equipment you are actually using. You end up bending down repeatedly to fetch your phone or your chalk. Bending down repeatedly to dig through a dark, cavernous bag drains energy. It pulls your back out of a neutral position right before a heavy set. A standard duffle is an obstacle. It is a container for clutter. This is why we engineered a different solution. We built a bag that lives up off the floor, out of the way, exactly where you need it.
Taking Action on Your Setup
If you are planning your home gym setup in Australia, do not leave gear organisation as an afterthought. Integrate it into your initial floor plan. Decide exactly where your personal items will live during a heavy squat set before you even bolt down your rack. A well-designed space removes excuses and friction. When your gear is sorted, your training becomes the sole focus. That is how you make consistent, long-term progress.
We design our products for serious lifters who want their space to function perfectly. Our products are dispatched from Sydney within 48 hours, so you will not be waiting weeks to get your setup finalised. If you are mapping out a new training space, upgrading your current gear management, or outfitting a commercial facility, we can help. Contact our team to discuss exactly what you need. If you want a setup that works as hard as you do, reach out to us and we'll sort it.
References
- Australian Bureau of Statistics (ABS). Participation in Sport and Physical Activity. Data regarding the high engagement of Australians in fitness activities, supporting the demand for home gym spaces.
- Australian Competition and Consumer Commission (ACCC). Product Safety Guidelines for Exercise Equipment. Standards ensuring structural integrity and user safety for home gym rigs.
- Standards Australia. AS 1668.2:2012 The use of ventilation and mechanical services in buildings. Guidelines for managing airflow and humidity in enclosed spaces like home gyms.
- Better Health Channel (Victorian Government). Physical Activity and Fitness. Health guidelines supporting resistance training and structured exercise routines.
- Safe Work Australia. Manual Tasks and Ergonomics. Principles of load distribution and floor protection relevant to dropping heavy weights.
Get exclusive training tips & early access
Join 5,000+ athletes who train smarter.
Frequently Asked Questions
How much does a home gym setup cost in Australia?
A quality home gym setup in Australia costs between $1,500 and $3,500 AUD for an intermediate level. This budget covers a reliable power rack, a high-tensile 20kg Olympic barbell, 150kg of weight plates, a heavy-duty adjustable bench, and thick rubber flooring. Costs can exceed $4,000 AUD for commercial-grade equipment.
What are the absolute home gym essentials?
The absolute essentials are a power rack with safety arms, an Olympic barbell, weight plates, and an adjustable bench. This combination allows you to perform heavy squats, deadlifts, flat pressing, and incline pressing safely. A reliable gear management system, like the HoldIT Bag, is also essential to keep your floor clear and your focus locked in during sets.
Can I put a home gym on the second storey of an Australian home?
You can, but it requires extreme caution. Suspended timber floors cannot handle the impact of dropped heavy weights. If you must set up on a second storey, build a heavy-duty lifting platform using multiple layers of plywood and thick rubber mats to distribute the force. Stick to lighter dumbbell work or bodyweight training to avoid structural damage.
How do I keep my gym bag off the floor?
You use a purpose-built magnetic bag hook. The HoldIT Bag features a magnet rated to hold up to 4kg of load, allowing it to attach instantly to the upright of any power rack, cable machine, or dumbbell rack. This keeps your bag elevated, secure, and within arm's reach, eliminating floor clutter and bench obstructions.
Is a 40L duffle bag necessary for gym training?
No, it is not. Most lifters only need their phone, keys, wallet, earphones, a water bottle, and small lifting accessories like chalk or wrist wraps. A right-sized bag that securely attaches to your station is vastly superior to a large 40L duffle that sits on the floor and creates friction between sets.
Do I need rubber flooring for my garage gym?
Yes. Rubber flooring protects your concrete slab from chips, prevents your weights from bouncing dangerously, and deadens noise. Use 15mm to 20mm thick rubber mats, which are standard in commercial and home gym setups across Australia.
How fast can I get my gear organisation system delivered?
At HoldIT Bag, we understand you want your setup sorted quickly. All our gear is dispatched from Sydney within 48 hours of your order, ensuring you get your training space organised without long delays.
Related Articles
The Ultimate Guide to Gym Accessories in Australia: Elevate Your Workout
Digital Gym Etiquette in Australia: How to Handle Phones and Filming at the Gym
Gym Bag Compartments Explained: How to Choose a Bag That Keeps Everything Separated in Australia
Your gear deserves better
Keep it clean, organised, and always within reach. The HoldIt bag system is built for athletes who take training seriously.